Korean Broccoli side recipe (gluten and dairy free, shred 10 compliant)

Hi, my name is Christina and I love Korean food. I’m constantly in search of new recipes, especially for side dishes. Recently, I found a new side dish recipe that is delicious and involves my family eating broccoli without any cheese or ranch dressing on and I’d like to share it with you.

I like Korean side dishes a lot because they are mostly veggies and they are intended to be made ahead of time and served from the fridge at a moments notice. Also, we eat them with chopsticks and my kids think anything eaten with chopsticks is fun food so they eat more of them. I am pro my kids eating more veggies.

I bought a huge bag of broccoli florets last week and wanted to find a Korean side recipe for them. We’ve had Korean broccoli at Ilmee (the best Korean restaurant in the Atlanta area), but my husband didn’t really like them because they didn’t have a spicy enough sauce on them. He loves my favorite rustic spinach side so I decided to look for a broccoli side recipe that had gochujang in it. I found this one on Lily Eats. I mostly followed it. The recipe I used is below.

Korean broccoli banchan

Ingredients:

  • 4 cups broccoli florets in bite-sized pieces
  • 3 tsp gochujang
  • 2 tsp sesame oil
  • 2 tsp soy sauce (or braggs liquid aminos)
  • 1 tbsp and 1 tsp rice vinegar (or apple cider vinegar)
  • 2 tsp minced garlic cloves
  • Sesame seeds to garnish (optional, we leave these out because my sister and hubby don’t like them)

Directions:

  1. Heat sesame oil on medium high heat in frying pan. Add garlic and broccoli and sauté for 4 minutes, stirring continuously. If anything sticks, add a little more sesame oil.
  2. Mix gochujang, soy sauce and rice vinegar in a bowl. Add to frying pan and stir to coat broccoli and garlic.
  3. Reduce heat to low and cover. Cook 8 minutes or until fork tender. Stir again to coat broccoli in any remaining sauce.
  4. Remove from pan and garnish with sesame seeds as desired.
  5. Serve warm or refrigerate until later.
  6. Enjoy and repeat.

Eggroll in a Bowl Recipe

A couple weeks ago, my husband came home and proudly handed me “a head of lettuce.” I don’t know what we were planning on eating that night that needed lettuce, but luckily we had a head of red lettuce in the fridge because that shiny head of lettuce he handed me was definitely cabbage.

I’m not a big fan of iceberg lettuce. Basically the only nutritional value it has are folic acid and vitamin A. 2 cups of green leaf lettuce has your entire recommended daily value of vitamin A, whereas cabbage only has about 6% of the RDV of vitamin A. Cabbage has over three times the dietary fiber as iceberg lettuce. It also has B6, which iceberg lettuce does not have. Cabbage has 60% of the daily value of vitamin C whereas iceberg lettuce has 4%. Both are a good source of vitamin K.

Unfortunately, my husband hates cabbage. A lot. So despite the nutritional value of cabbage, it seemed doomed to die a slow slimy death in my fridge. I kept looking at it and asking what I could possibly make with it that my family would actually eat.

About a week later, a friend of a friend posted a recipe on FB for eggroll in a bowl. I got all excited and asked my husband if he liked egg rolls because I swore I could remember him eating egg rolls at that little Chinese place in Canton that he loves and since the main ingredient for this dish was cabbage I thought I’d finally found what I could do with that sad, doomed head of cabbage in my fridge. Then he replied that no he did not like egg rolls. Ugh.

But I decided I liked the recipe so I was going to try it anyways. So that night I made eggroll in a bowl for the kids and beef curry for my hubby. When he got home, the eggroll in a bowl was ready but the curry was not so he tried the eggroll in a bowl and he liked it. The kids all liked it, too, (yes, even Izzy) so I will definitely be adding this to our meal rotation. So yay for incorporating cabbage in our diet in a meal that everyone likes!

I wish I could remember who posted the recipe. Or even who our mutual friend is. But I can’t. Also, I didn’t really follow it 100% because I’m a recipe rebel. So I’m just going to share the recipe I used.

Eggroll In A Bowl

Ingredients:

  • 1 head of cabbage, chopped in thin strips (not unlike the cabbage strips in egg rolls)
  • 2 carrots, peeled and shredded
  • 1 lb or less of ground beef or ground turkey or curry beef (I used 1/3 lb curry beef left over from making curry)
  • 4 tsp sesame oil
  • 1/2 tsp dried ginger
  • 1/4 cup chicken broth
  • 3 tbsp braggs liquid aminos
  • 1/2 tsp sriracha
  • 1/2 tsp Apple Cider Vinegar or rice vinegar (because apparently these are interchangeable)
  • 2 tsp minced garlic
  • 2-3 green onions (chives), sliced in long thin strips
  • Bean sprouts (optional)
  • Salt and pepper to taste
  • 2 cups rice
  • 2 1/4 cups water (to cook rice)

Directions:

  1. Brown meat in skillet, season with salt and pepper as you cook.
  2. Combine liquid aminos, sriracha, ginger and vinegar in a bowl.
  3. Drain meat and remove from heat.
  4. Add oil to pan and sauté cabbage and carrots.
  5. Add green onion and bean sprouts and sauté for a few minutes.
  6. Add garlic and sauté for a minute then add the broth.
  7. Cook until cabbage is as soft as you like (I cooked for 15 minutes because my husband has issues digesting veggies that aren’t fully cooked).
  8. Add sauce and meat.
  9. Cover and continue to cook or turn to low to keep warm, stirring occasionally.
  10. Put rice and water in rice cooker and cook according to rice cooker directions.
  11. Serve over the rice.
  12. Enjoy and repeat. 🙂

Pico de Gallo recipe (gluten, dairy and sugar free)

This is another of JoAnna’s awesome recipes. She made it once when I was pregnant and I loved it so I had to keep making it all the time. I’ve been making it ever since. I think this was back when I was pregnant with Izzy and she will be 10 in a couple weeks so this is a long-loved recipe, tried and true.

It takes a while to make because it involves a lot of chopping and some of my kids won’t eat it because “it’s spicy”, but I like it so much I don’t even care if they eat it. I’d eat it all by myself and be totally ok with that. It’ll just take me a while. It’s good on tacos, burritos, any Mexican food really and is good on tortilla chips as well.

This recipe makes a big batch. If you want, you can make half of it to start off with and use half of everything except the cilantro (because it’s hard to divide a bunch of cilantro).

I don’t think it would freeze well, but I don’t know for sure. I’ve never had enough left to freeze. It can be made ahead of time and refrigerated. It’s gluten free, dairy free, sugar free, junk free, full of different colors of veggies and absolutely delicious. And if you make it and you don’t like it, let me know and I’ll come eat it for you.

Pico de Gallo

Ingredients:

  • 10 Roma tomatoes, diced
  • 5 jalapeños, seeded and diced
  • The leaves from 1 bunch cilantro
  • 2 bunches chives, diced
  • 1 onion (you can use red or white, I usually use white but red would be prettier), diced
  • 1 lemon, juiced
  • Salt to taste

Instructions:

  1. Chop all ingredients.
  2. Mix all ingredients.
  3. Taste and add salt, if needed.
  4. Enjoy and repeat.

Cough and Cold Relief Recipe

This week, we were blessed to be able to visit my Gramese in the bayou. It’s been 3 years since we’ve been able to visit at Christmastime and over 2 years since we’ve been here. The last time we were here was in September 2015 for my Gramese’s 80th birthday. It takes 6-8 hours to drive here so we usually try to come when we can stay about a week, but that time we came in for the weekend for her birthday.

We were going to have a surprise party for her, but I guess the secret was kept too well because she decided she would throw herself a party “since no one else was going to.” It was a good party and we were glad for the excuse to visit even if it wasn’t as long of a visit as we’d have liked.

My Gramese has lived in the same house since I was a baby. It’s been beat up and repaired a few times during various hurricanes, but it’s still there and it’s still my favorite spot in the whole world. It’s always been a place where I’ve felt loved and I’ve felt like I belong. My Papa was one of my favorite people in the whole world. He’s been gone over 7 years now, but his memories are still here, with the rest of my people that I dearly love.

We’ve been planning this vacation since before October, but right before we left I started to feel like I had a cold coming on. We had a choice to come now with the beginning of a cold or not come at all and not be able to come again for at least a year. So I drank some elderberry syrup and loaded up on vitamin c and prayed to God I wouldn’t make any of my favorite people sick. We made the drive pretty uneventfully, but once we got here, Gramese had lost her phone and had her house locked up tight. It was pretty cold and I was tired so I didn’t think to knock on her window until my cousin suggested it and then we got in, but the cold didn’t help my cold get any better.

The next day, my Gramese introduced me to her special cough and cold recipe. The first time I drank it, it made me snottier. The second time, it got rid of my snot entirely. The third time, we drank it as a family because Rory needed a second dose and it ended in everyone but Izzy drinking it and Izzy throwing an epic fit because it was gross.

It is gross. I’m not gonna lie. But it’s medicinal and medicine isn’t meant to taste good. It’s meant to help you be well. As I type, Izzy’s drink is sitting on the counter while she takes a nap and she’ll have a second chance to finish it when she wakes up. So I guess in our case, it’s helping get rid of cough, cold, and stubbornness.

Izzy can be difficult. She’s stubborn and willful and determined and all of those things will be good one day when she’s an adult, blazing new trails and leading the way, but when it’s time to eat or drink something she decides she doesn’t like or want, it’s not a good attribute these days. Hopefully if she’s ever offered drugs, she’ll resist them with as much fervor as she resists food and drink now. That’s all to say that when I post a recipe and say that it’s Izzy approved, it’s kind of a big deal in our house. Because if anyone is not going to approve of food or drink, it is usually Izzy and it’s usually epically dramatic.

This recipe is not Izzy approved, but it does get rid of a cold. It is good for the body and boosts the immune system. But it does not taste good.

Cough and Cold Relief Recipe

Ingredients:

  • 1 cup warm green tea
  • 2 squeezes fresh lemon juice
  • 1/2 tsp baking soda

Instructions:

  1. Prepare green tea, steep a few minutes then squeeze out and discard tea bag.

  1. Squeeze lemon twice over small strainer (to catch seeds) into cup.
  2. Add baking soda, stir and chug.
  3. Repeat until your cold is gone.

Note: You want the tea to be warm, but cool enough that you can drink it without stopping. It’s not something you want to sip or hold in your mouth for a long time, but it doesn’t leave a bad aftertaste when you’re done. It’s simple to make and will boost your immune system and won’t have any bad side effects so you can drink it if someone else in your family is sick to help you not catch whatever bug they have. It also helps you to empty your bowels so keep that in mind. Just like any medicine, hopefully you won’t need it, but if you do, it’s nice to have something that works.

If you have a stubborn kiddo and you have any tips for getting them to drink yucky medicinal stuff, is love for you to share in the comments. If not, I’d appreciate your prayers. Having an Izzy is not for the faint of heart.

Korean Spicy Green Onion Salad banchan recipe

If you’ve been reading my blog for a while, you know I love Korean food. I’m always in search of a new side dish (banchan) recipe to add to my collection.

A while ago, my sister mentioned a green onion side she’d liked when she was in South Korea. I’d been wanting curry for a couple days now and decided tonight was a good night to have it and to try my hand at a new side since I had a bunch of green onions in the fridge.

I found a recipe on My Korean Kitchen that looked good so I decided to try it. It turned out pretty good. It wasn’t quite the same as the one my sister had in South Korea, but she liked it.

It’s kind of tedious to make as you have to slice the onions very thinly and that takes forever. It took so long that my kids were in bed before I finished it. So Eddie, Jessie and I were the only ones who tried it. Eddie didn’t like it because it tasted too oniony, but Jessie and I did (although I do agree it is very oniony). I hope you like it, too.

Korean Spicy Green Onion Salad

Ingredients:

  • One bunch of chives, cut in thirds and sliced thinly
  • 2 tbsp soy sauce
  • 1 tbsp sugar
  • 1 tbsp sesame oil
  • 1 tbsp sesame seeds
  • 2 tsp Korean chili flakes
  • 2 tsp white vinegar
  • 1 tsp minced garlic

Directions:

  1. Rinse onions in cold water for 3 minutes to remove the slimy surface.
  2. Shake strainer over sink to drain.
  3. Mix the rest of the ingredients to make a dressing.
  4. Mix dressing ingredients with onions lightly but thoroughly.
  5. Serve on a plate immediately. It will begin to wilt in 3-5 minutes.
  6. Enjoy and repeat.

Taco Tuesday, shred style (gluten free and dairy free) 

My husband and I have been trying to get healthier for a while now. This month, we are doing the Shred 10 for the second time. The first time, my husband lost 15 pounds in 28 days and I lost 6 pounds in 21, jump started by our first shred 10. I’m really hoping to jumpstart some more weight loss with another shred 10 this month. 

For those of you who don’t know what the shred 10 is, it is a 10 day detox, abstaining from foods that cause inflammation and tax our adrenal glands. For this 10 days, we have a shake for breakfast, a shake for dinner, and in between we eat lots of fruits and veggies, drink our water, continue to take our juice plus and avoid caffeine, gluten, dairy, processed foods, sweeteners, and GMOs. We also strive to get at least 7 hours of sleep every night, not eat after 6 pm (or whenever we finish our night shake) and exercise almost daily. 

It sounds awful and hard, I know, but I lived through it once before and felt great afterwards. Since then, we’ve continued to use shakes as our breakfasts and I can count on one hand the amount of times I’ve had coffee in the 3 months since so this should actually be a lot easier than last time. 

The hardest thing for me is the dairy. I love cheese and greek yogurt on my burritos. I also prefer the taste of regular tortillas and the fact that they don’t fall to pieces like gluten free tortillas. As you can see, my main staple of my diet (and favorite food) is greatly affected by shred 10 and not in a good way. If I didn’t love burritos so much, I would probably make the shred 10 diet my normal diet because I feel a lot better when I follow it, but I love burritos so. . . Burritos for the win, I guess.  

In preparation for the shred 10, I have gone back through the recipes I’ve posted and tagged them as “shred 10 recipes” if they conform to the shred 10. Also, I will be taking pictures of some of my meals to share in a post once the shred 10 is over, that way if any of y’all want to give the shred 10 a try, you’ll have some ideas. And I’ll have some ideas saved up for the next time I do the shred 10. Win, win. 

Today, for taco Tuesday I wanted to share 2 shred approved taco/burrito options. I made chili for the kids for dinner, from which I sniped some beef and made a burrito for myself for lunch on a gluten free tortilla with a bed of lettuce, some of my homemade salsa and some avocado. 

Another great option is breakfast tacos. Three eggs, scrambled on 2 organic corn tortillas with a bed of lettuce, some homemade salsa, some organic breakfast sausage and avocado. Yummy, gluten free, dairy free and full of veggies. 

That’s how I do tacos and burritos on the shred. Happy Taco Tuesday, y’all. 

My favorite chicken soup recipe (gluten free, dairy free)

Chicken soup and I go way back and for most of my life it has been sadly misunderstood. When I was growing up, chicken soup and sprite were “sick foods”. You had them when you were sick and only when you were sick so after a while a “sick” flavor formed in my mind and I was set in my ways and I only had chicken soup and sprite when I was sick because if I tried to have them when I wasn’t sick, I tasted the sick and it was extremely off-putting. The only time chicken soup or sprite would taste good was when I was sick. Yes, I know I am neurotic. 

Then I lost Maggie and my awesome friend Megan made me chicken soup and it was just so comforting that chicken soup transformed into a comfort food in my mind and in my palate. I have no idea what recipe she used, but it rocked my world and changed my relationship with chicken soup forever. Thanks, Megan ❤ 

So I started looking for a chicken soup recipe that I could make. I used to make chicken soup all the time –well, mostly when someone was sick except for that one time a friend and I went through my little black bartender book and my liquor cabinet and decided to try every recipe we had the ingredients for and somehow I also wound up making chicken soup (along with a substantial mess) that night. I guess I had all the ingredients for that recipe, too. . . Unfortunately, I either never wrote down my recipe or lost it in the 5 or so moves I’ve had since then. 

I finally found this gem and even though I had no clue what a parsnip was, it called me and I decided to try it. Life altering. It’s amazing how chicken soup can change your life. Maybe that’s only true if you’re a foodie? Either way. Life altering for me. 

For the most part, I stuck to the recipe because it is soup nirvana, but I did add leeks after I discovered them in a stir fry recipe. If you have not discovered leeks, I strongly encourage you to go to the grocery store and smell them. They are as lovely to the nose as the tongue and vice versa. I also added garlic and ginger both for their flavors and their health benefits and some parsley and thyme. I chop the onion last, as I’ve read onions absorb the germs from the air from the time they’re cut until the time they’re cooked and I don’t want to add germs to my soup in my onions. Finally, I don’t use all the chicken in the soup, I reserve some for wraps or another recipe the next day and I don’t discard the bones or the skin, I use them to make bone broth in my power cooker, which is a super nutritious and cheap addition to our diet and a great thing to have on hand for upset tummies as it’s packed with nutrition and easy to digest and just a great thing to add to any recipe in place of processed chicken broth, using the parts of the chicken you’ve already bought that you would otherwise just discard. Bonus the bone broth you make with this batch of soup can be frozen and used in the next batch of soup. It’s like the soup circle of life. 

The recipe I use is below, the original is here and can I just interrupt myself for a moment to say thank God for Pioneer Woman? Her recipes are seriously a foodie dream come true as far as taste goes and a healthy cooking dream come true. Sometimes when I’m looking for a recipe to try, I type in what I want followed by Pioneer Woman because I’ve had so many successes with her recipes. I’m a big fan of her recipes to say the least. 

Chunky Chicken Soup

Ingredients:

  • 1 whole chicken
  • 1 bay leaf
  • 64 ounces bone broth (or a combination of bone broth and water, if desired)
  • 1 large onion or 2 small onions, diced
  • 4 whole ribs of celery, sliced thickly (my husband does not like celery and I love him so I usually pick them out of his — shhh don’t tell the kids)
  • 4 whole large carrots, peeled and chopped
  • 3 whole parsnips, peeled and chopped (I buy parsnips in a one pound bag, usually there are 3 occasionally there are 4, either way I use the whole bag.)
  • 1 leek, sliced thinly 
  • 1 tbsp minced garlic
  • 1″ ginger, peeled and finely minced
  • Salt to taste
  • Pepper to taste
  • Parsley to taste 
  • Thyme to taste

Directions:

  1. Place all ingredients but the pepper into a pot. I like to put the chicken, the veggies, the spices and then the broth and if the broth doesn’t cover them all, I add a little water so it does. 
  2. Bring to a boil, then reduce to a simmer. 
  3. Cover and simmer for 1 hour, or until chicken is done but not falling off the bone (this makes it easier to remove from the pot intact). 
  4. Remove chicken, reserve skin and bones if you’d like to make bone broth, chop meat to desired size and return as much chicken as you desire to the pot. Continue to simmer for 30 minutes to an hour until vegetables are tender, and soup flavor is divine.
  5. Taste and adjust seasonings as needed, continue to simmer on low until ready to serve. 
  6. Serve in a bowl, then sprinkle black pepper over the top. I also like to garnish with avocado slices. Yummy. 
  7. Enjoy and repeat. 

Recipe credit to Ree at thepioneerwoman.com. I don’t know her, but I love her food. 

*Note: Adjust broth levels and/or vegetable amounts as needed. Also, this makes a lot of soup and it is a good freezer recipe. We are going to eat on it tonight and once it cools, I’ll be freezing it for the next time someone gets sick because it’s so much easier to have chicken soup on hand when someone is sick than to have to make it and comfort a sick child at the same time. 

Waste not, want not — Making Power Cooker/ Crock Pot Bone Broth 

What is bone broth anyways? Much like the concept of “waste not, want not” it’s a throw back — a traditional way of using every part of the animal to nourish our bodies and add flavor to our food. Bones, skin, fat, grissle, any part of the animal you have no other use for is thrown into a pot with some rough chopped veggies (or veggie scraps – the bottom inch of the celery that gets chopped off, leftover bits of veg not used in other recipes, etc.) and cooked on low overnight, causing the bones and ligaments to release healing compounds like collagen, minerals and amino acids that are easy for the body to digest and have beneficial effects on every part of your body and that are not present in the same quantities (and some not present at all) in processed chicken broth. 

Most store bought chicken broths available these days are made with meat flavoring, msg, and other preservatives that I just don’t want to put in my families bodies and they are missing the nutrition of bone broth. Bone broth is cooked much longer than chicken broth and with chicken parts, veggies and other whole food ingredients. The longer cooking method draws the nutrition from the bones, marrow, ligaments, and skin, every bit of the chicken. Bone broth contains minerals in forms that your body can easily absorb: calcium, magnesium, phosphorus, silicon, sulphur and amino acids that reduce inflammation, improve digestion, boost the immune system and provide beneficial effects for the whole body and add more flavor to your food at the same time. 

What comes first — the chicken soup or the chicken bone broth? That’s a hard one. Right up there with the chicken and the egg at our house. . .

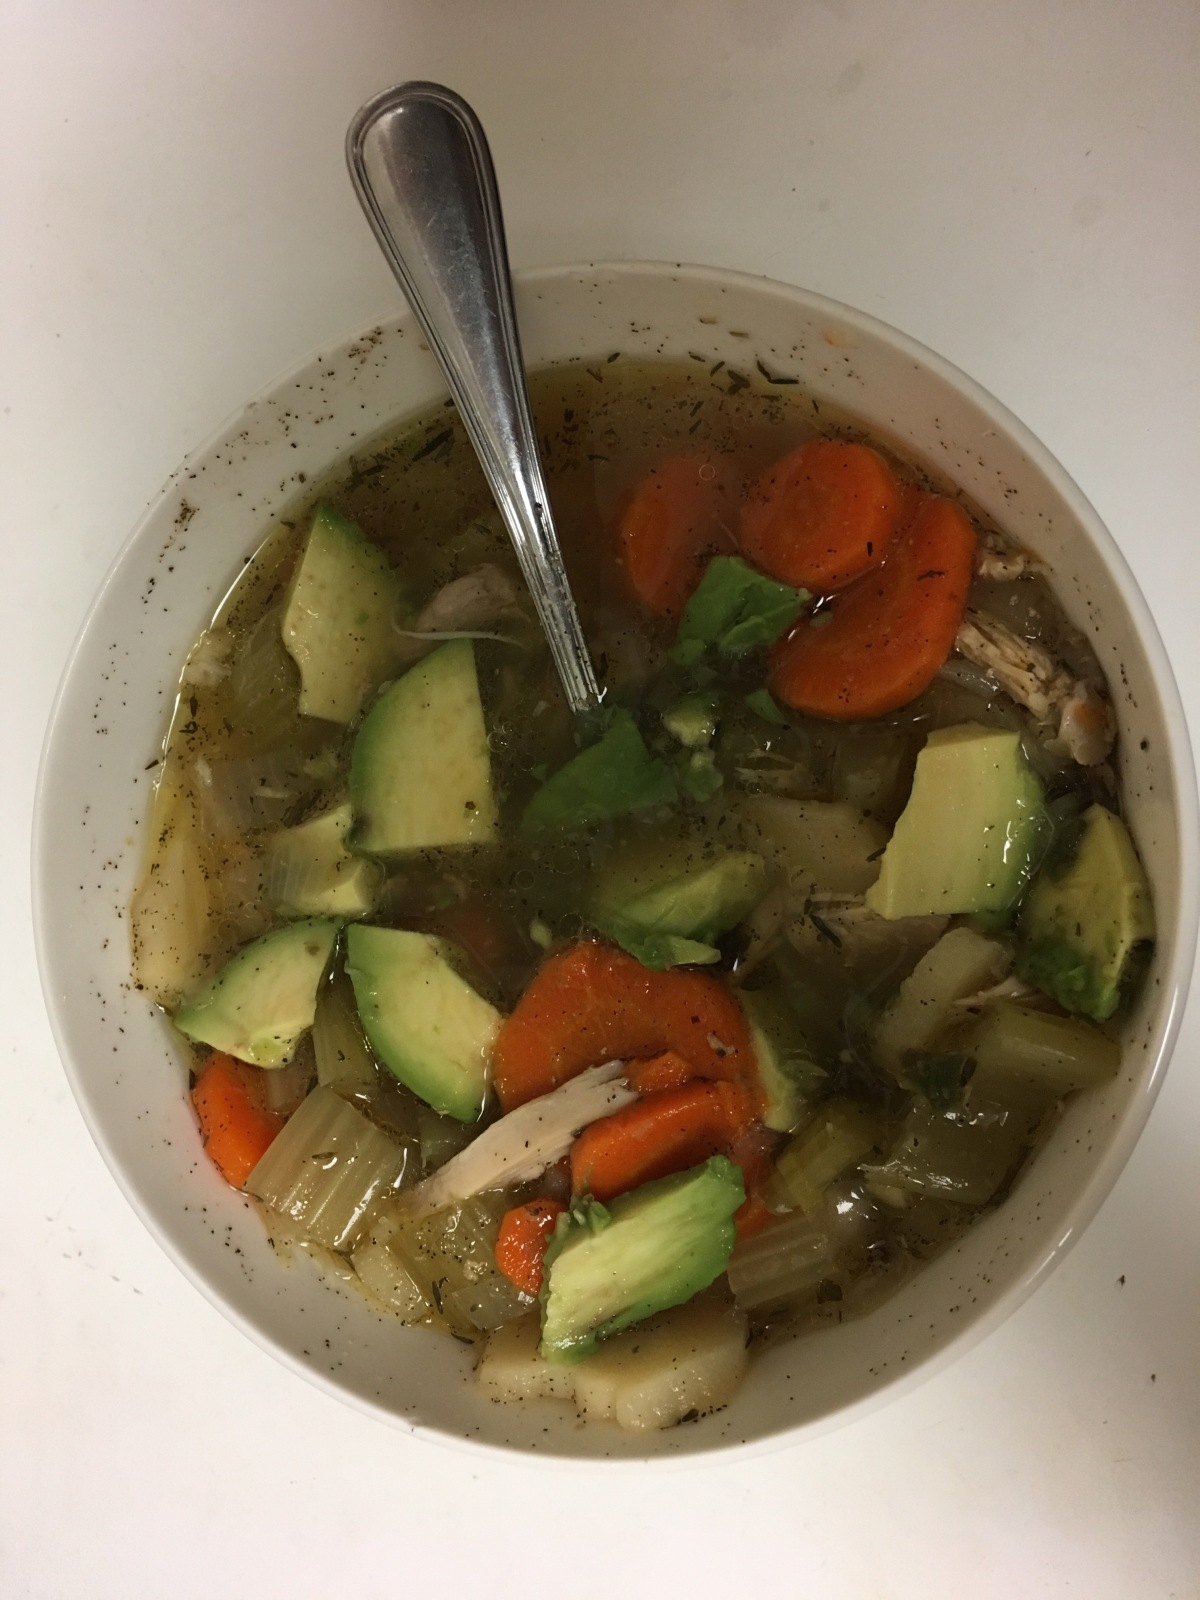
As the weather turns colder, I am aware of the greater presence of germs everywhere and I’m naturally trending toward recipes that will boost our immune systems and help us get well quickly if we get sick. One of my favorites is chunky chicken soup, which I’ll be sharing the recipe for in a few days. A byproduct of that soup and a necessary ingredient for making it in our house is chicken bone broth. In the chunky chicken soup recipe,  I use a whole chicken. I simmer it in the soup with the veggies, spices and bone broth for an hour and then remove the chicken, place it in a large glass bowl and dissect it. The chicken goes into 2 piles from there. The chicken I’m ok with putting in our mouths goes on a plate and the parts I don’t want to put in our mouths goes into the power cooker to make bone broth. Everything gets used. Once I separate it, the chicken I have on the plate gets separated further. The white meat gets shredded and put into the fridge to make something else with (that’s enough for a meal at our house) and the dark meat goes back into the soup. 
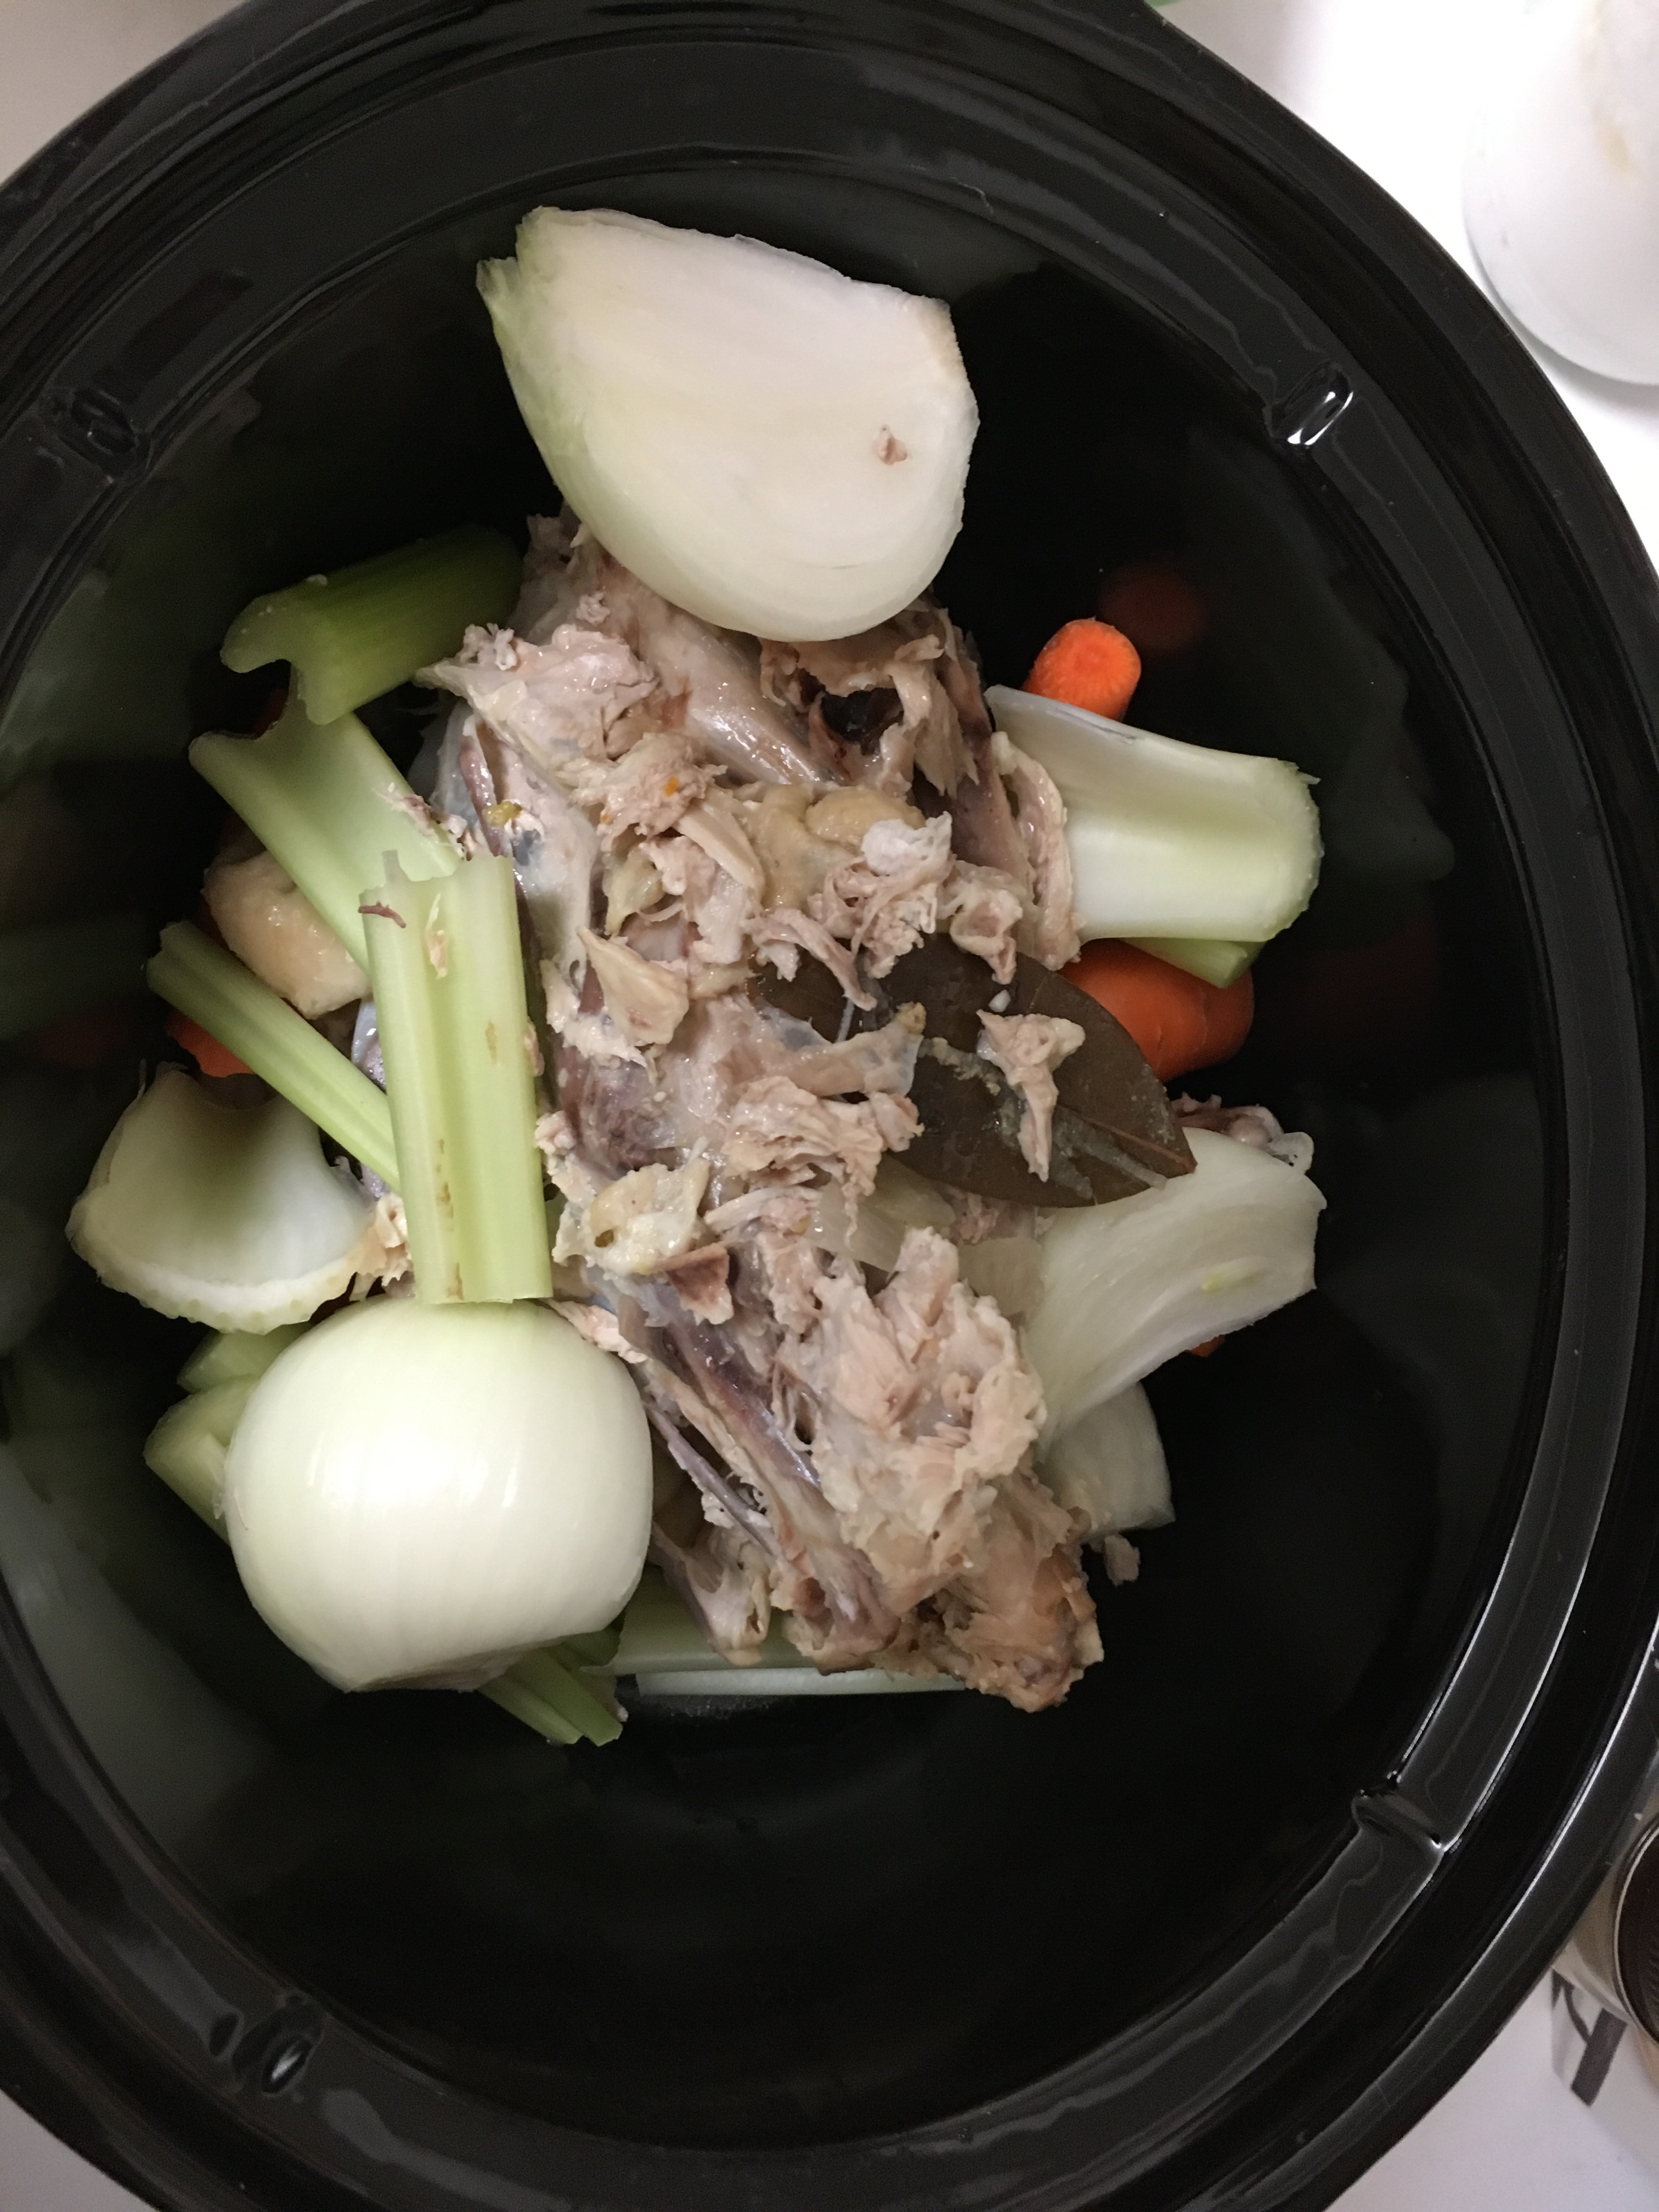
To the power cooker, I add an onion peeled and quartered, some salt, a rough chopped carrot, celery stalk, some parsley, some thyme, all parts of the chicken we don’t eat and any other random veggies in my fridge that beg to be used. If you are missing onions or celery, you can make it without them, too. This is a very flexible recipe.  I fill the power cooker  with filtered water to the max fill line, add a bay leaf and cook overnight on low in the power cooker’s low temp cook setting, which is the equivalent of a crock pot low temp setting so if you don’t have a power cooker but do have a crock pot, you can use that instead. 

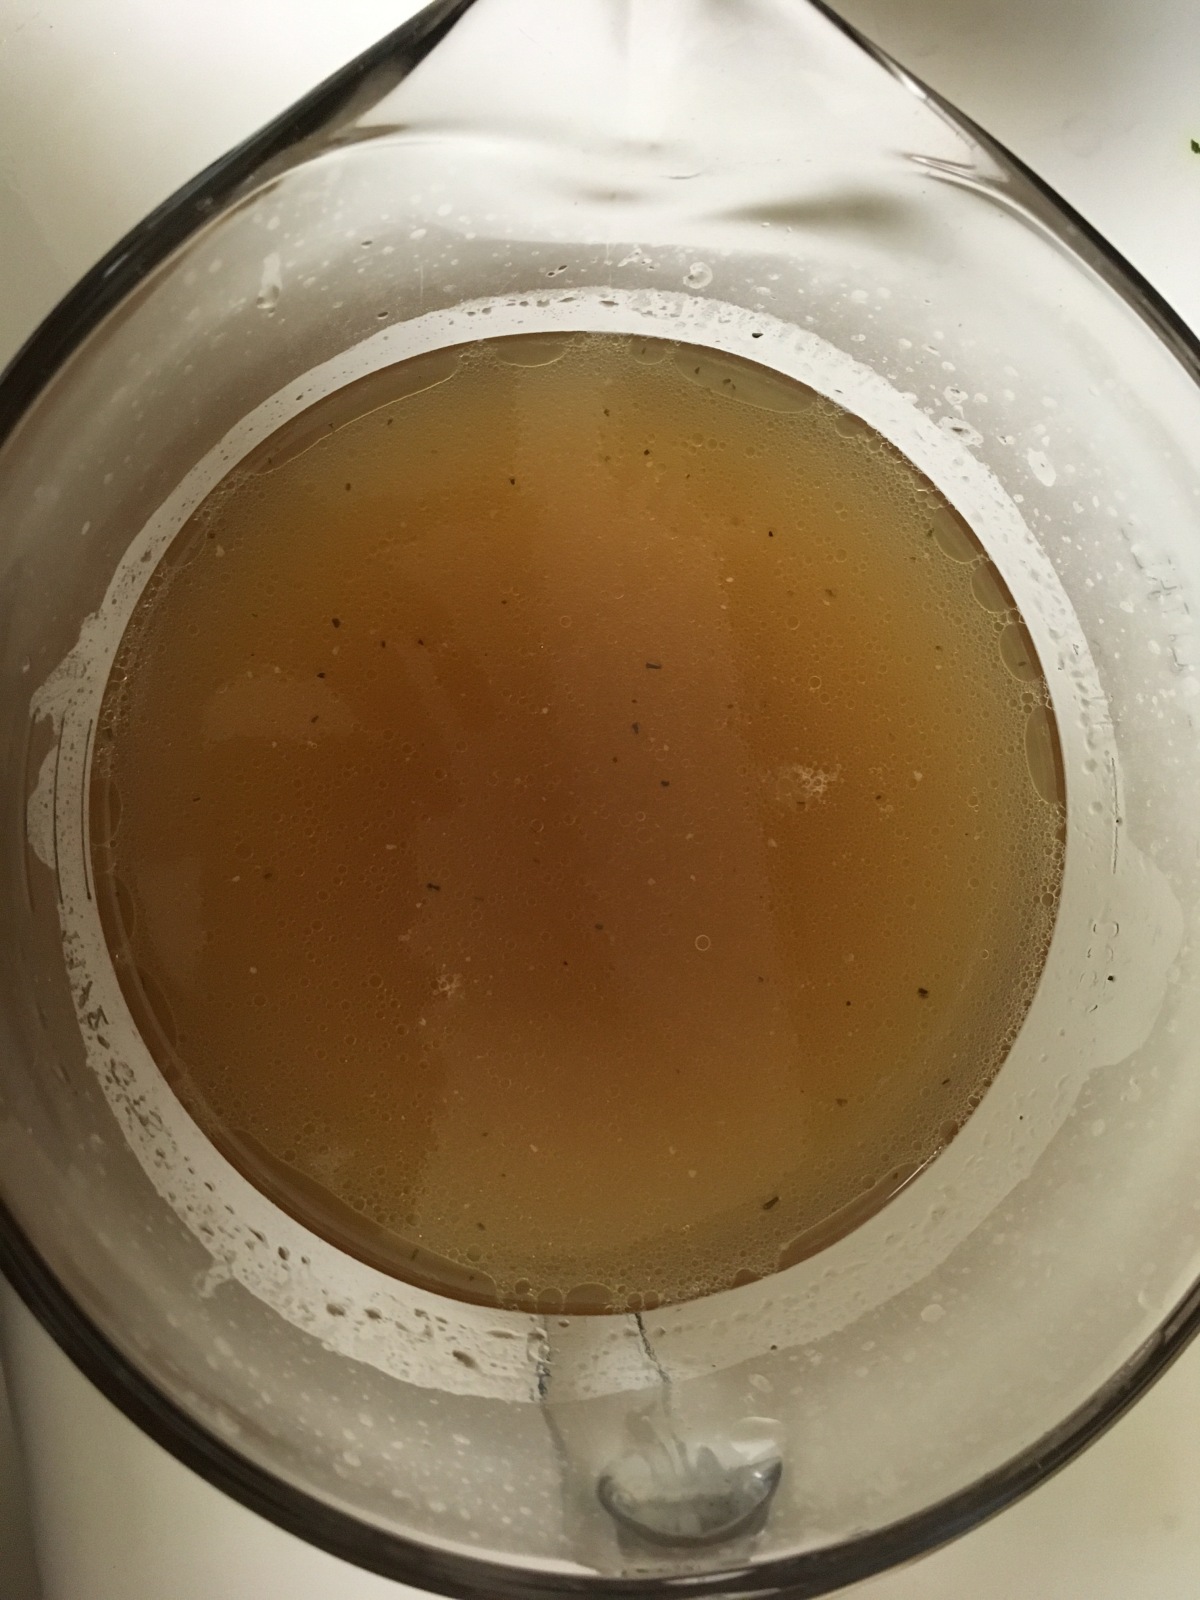
The next day, I use my metal fine mesh colander to strain out the non liquid bits and I strain it into a big pot that can hold all the broth. Then I toss the solid bits, let the broth cool and freeze it in 4 cup portions to use in recipes in place of boxed or canned chicken broth. I like to keep one quart of it in my fridge to throw into any recipe that calls for water to add some more flavor and nutrition to rice dishes, beans, soups, my favorite one pot cheesy chicken, rice and broccoli dish or just to warm up to drink if anyone in our house isn’t feeling well. 

 Just one more way to use what you already have to make your diet just a little healthier. You’re welcome. 

DIY Power Cooker/ Crock Pot Bone Broth 

Ingredients:

  • Bones, skin and any other part of a whole chicken you don’t want to eat
  • 1 onion, peeled and quartered
  • 1-2 carrots, chopped roughly
  • 1-2 celery stalls, chopped roughly
  • 1 bay leaf
  • Thyme, parsley, salt and pepper to taste 
  • Enough filtered water to fill crockpot
  • Any additional veggies you want to add (optional)

Directions:

  1. Put all ingredients in power cooker or crock pot. 
  2. Cook on low overnight (at least 10 hours, the longer you cook, the more nutrition you get from the bones). 
  3. Strain with metal fine mesh strainer, allow to cool and refrigerate or freeze to use later. 
  4. Enjoy alone or in your favorite recipes in place of chicken broth or water and repeat. 

Note: the broth is great to use in your next batch of chicken soup or good to drink alone, especially if you aren’t feeling well. The gelatin from the bones is good for gut health and we all know chicken broth is good for all that ails you. Well, bone broth is even better for you than chicken broth. Add this to your family’s sickness regiment to get better faster or add it to your wellness regiment — drink some to boost your immune system and fight the sick before it hits. Food is the best medicine y’all. No nasty side effects. 

If you’re interested in more healthy living tips, stay tuned. I will be adding more tips over the next couple of weeks as we prepare for “sick season” at my kids schools to start. Feel free to subscribe to my blog so you don’t miss anything. 

Spicy Asian Zucchini banchan recipe

Tonight, I made Sesame Chicken, Kelp Noodles and Veggies recipe, except this time I added some snap peas to it and doubled the sauce. This time, all my kids loved it, as did my husband and my sister. I guess it grew on Rory. She said this time there were more veggies and less kelp noodles in her bowl so maybe the snap peas made all the difference? Who knows. 

I was going to make Korean Rustic Spinach to go with the kelp stir fry and the Carrot Kimchi I had already made because so far, the rustic spinach is my favorite banchan recipe and I don’t need much of an excuse to make it, but then I found a zucchini in my veggie drawer that was begging me to use it. 

It was bored and lonely and feeling neglected and was very persuasive so I did a little looking on the internet to find a recipe for a side dish made with zucchini. There were a couple I was interested in until I saw that they called for ingredients I didn’t have and I (umm, I mean the zucchini) was beginning to despair of finding a banchan recipe to use it in and then I came across this gem. Not only did it only use ingredients that I had, but as a bonus, it used sriracha, which I love but have only ever used in JoAnna’s Buffalo Chicken Dip even though it’s a Thai chili sauce, an Asian condiment named after the coastal city of Si Racha, in Chonburi Province of eastern Thailand, where it is thought to have been first produced. Another bonus, the recipe said it’s good served warm or room temperature so I decided to make it before I made the stir fry since stir fry is best served warm. 

The only thing I wasn’t sure about with this recipe was the honey in it. I temporarily considered omitting it, but for some reason I decided to just follow the recipe and see how it turned out. The kids thought it was a little spicy, but good and my husband loved it and he usually only likes zucchini in my zucchini bread. My sister and I liked it, too. I hope you like it as much as we did. 

Spicy Asian Zucchini 

Ingredients

  • 1 large zucchini, cut into 2″ long, thin strips
  • 2 tsp Sesame oil
  • 1/4 cup soy sauce 
  • 2 Tablespoons sriracha sauce
  • 1 teaspoon honey
  • 2 Tablespoons sesame seeds
  • 2 green onions, thinly sliced
  • Salt and pepper to taste

Directions:

  1. Heat 2 teaspoons of sesame oil in a large skillet over medium high heat. 
  2. Add the zucchini (you may have to saute them in batches depending on the size of your skillet and how much zucchini you have). 
  3. Sprinkle with salt and pepper and saute until browned and tender. Remove from heat. Repeat with remaining zucchini if needed.
  4. Whisk together the soy sauce, sriracha, and honey. Pour the mixture over the sauteed zucchini. Toss to combine. 
  5. To serve, sprinkle the zucchini with sesame seeds and green onions. This side dish is tasty warm or at room temperature. (I can testify to that because I tried it both ways.)
  6. Enjoy and repeat. 

Recipe credit goes to Courtney at neighborfoodblog.com

Chicken Stir fry recipe 

So I really wanted to eat Sesame Chicken, Kelp Noodles and Veggies again, but I didn’t have any kelp noodles left so I had to make do with stir fry. I used a lot of the ingredients in the Sesame Chicken, Kelp Noodles and Veggies recipe, made some rice and went to town. It was so yummy and this time all the kids ate it without complaining. I love it when that happens. 

Chicken Stirfry Recipe

Ingredients:

  • 3 chicken breasts, cut in bite sized pieces 
  • Bok choi, sliced vertically and thinly
  • 1 leek, sliced thinly 
  • 4 carrots, peeled and spiralized 
  • 4-5 scallions, sliced thinly
  • 1 bell pepper, sliced thinly
  • 8 ounces mushrooms, diced
  • 1.5 crowns (or 10 oz bag of florets) broccoli, cut into bite sized pieces 
  • 2 cups of this rice 
  • 2.25 cups water
  • Sauce Ingredients:
  • 2/3 cup Braggs liquid aminos
  • 4 tbsp sesame oil
  • 4 cloves minced garlic
  • 6 tbsp sesame seeds 
  • Korean red pepper flakes to taste
  • Olive oil 

Ingredients:

  1. Heat the olive oil in a large skillet over medium heat. Fry the mushrooms for 5-8 minutes, until the liquid from the mushrooms has evaporated. 
  2. Add the chicken, bell pepper, carrots, and broccoli. Stir fry for 3-4 minutes, then add leeks, scallions, bok choi, and cook another 3-4 minutes until the chicken is almost cooked through but not dry.
  3. Whisk together the coconut aminos, toasted sesame oil, garlic, sesame seeds and Korean red pepper flakes to make the sauce. 
  4. Add the sauce to the pan. Stir fry for about 5 minutes, until heated through. 
  5. Add water and rice to pressure cooker, select rice setting and change cook time to 2 minutes and cook. 
  6. Put rice on plate, top with stir fry and serve. 
  7. Enjoy and repeat.